|

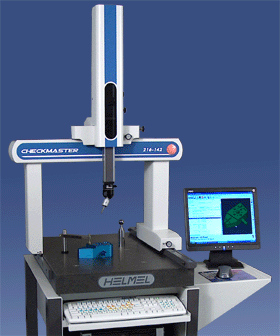
Checkmaster Reliability
The compact Checkmaster is a bench top CMM ideal for lab or production floor. Hardened stainless steel ways and steel scales on steel structures offer uniform linear expansion minimizing thermal errors. The low cost means you can put competent inspection capability in multiple locations throughout your plant.
Intrinsic Accuracy Manual CMMs
We test every CMM before it leaves the factory for repeatability and accuracy, that meets or exceeds the industry standards as defined in ANSI B89.4.1a-1998.
Our testing includes a repeatability
test that exceed a minimum of 150
cycles, often recording a total range of
2.0 µm (0.00008") or better! These
stringent targets are maintained without
the need for expensive software
compensation maps. Our goal is to build
the CMM mechanically correct that will
deliver the results you expect,
year-after-year.
Every Checkmaster is
designed and packaged for fast and
secure installation by the customer. All
key components are protected during
shipping by specially designed brackets,
that when removed, ensures the CMM is
ready for your first inspection.
The Ideal Scanning
System
Not every reverse engineering job requires expensive motorized CMMs. The Checkmaster using the Geomet Junior software provides tools such as GeoTracer which allows you to
capture large data data point clouds
using low cost hard probes. Ideal for
outline tracing!
Geomet Junior
The software is
preinstalled in the supplied Windows XP
computer system. One USB connection from
the CMM Interface is all that is
required to complete the system. A User
Guide is provided with easy-to-follow
tutorials including sample inspection
programs. Geomet maintains a web site
dedicated to Geomet. Through
this site, you will have the latest
access to software upgrades and a full
online manual that can be accessed
directly through your CMM and Geomet.
Would you like more
information?
Please use our information
request form. |


