|
 Geomet
provides tolerancing for all measurements or
for only those desired, during manual
measurements or as part of programs. For any
dimension, the nominal value and the related
tolerances may be entered. The results will
indicate this nominal and tolerance
information and show deviation from nominal
values along with deviation from tolerance,
with a proportional graphic when in
tolerance or an actual value when out of
tolerance. This makes finding any
out-of-tolerance condition very easy. Geomet
provides tolerancing for all measurements or
for only those desired, during manual
measurements or as part of programs. For any
dimension, the nominal value and the related
tolerances may be entered. The results will
indicate this nominal and tolerance
information and show deviation from nominal
values along with deviation from tolerance,
with a proportional graphic when in
tolerance or an actual value when out of
tolerance. This makes finding any
out-of-tolerance condition very easy.
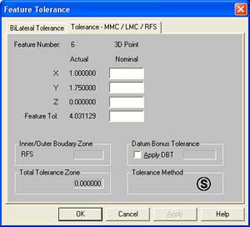
Tolerance formats include Bilateral and True
Position, with support for RFS, MMC and LMC.
Bonus tolerances are automatically
calculated.
GEOTOL functions access sub-routines for
form tolerancing such as circularity,
straightness and parallelism, etc.
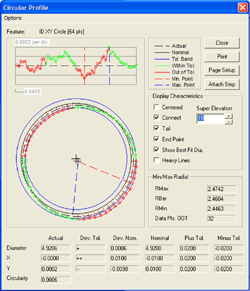
 Multi-Point
Features, such as a the circle shown here,
have tools that provide a visual, as well as
analytical understanding of the shape. Multi-Point
Features, such as a the circle shown here,
have tools that provide a visual, as well as
analytical understanding of the shape.
Here we see that some data points are
outside the nominal boundary limits,
although the reported XY position and
diameter reported within the tolerance
limits. |


